• Skip to primary navigation
  • Skip to main content
  • Skip to primary sidebar

Top Shoes Brand

Reviews of the Top Shoes on the Market

  • Home
  • Boots
  • Shoes
  • Blog

Ema Watson

How You Can Remove Yellow Bleach Stains from White Canvas Shoes

July 21, 2021 By Ema Watson

White canvas shoes present a classy and trendy look in the current fashion. White shoes make a great look in every dressing code. You will always look great in white shoes no matter the color of clothes you wear. 

But on top of these good qualities, they tend to disappoint by turning yellow after washing. The stains resemble yellow bleach stains, which make the beauty vanish. Read through this article, and let’s learn a few tips that may help remove these yellow bleach stains.

Why do my white canvas shoes turn yellow?

Chemical reaction with the sun

When our white shoes get dirty after wearing them, we have no option but to wash them. What most people don’t know, upon washing, chemical reactions take place.

Water has oxygen and hydrogen components that, upon exposure to the sun, function like reactants. An oxidation process takes place due to these components resulting in the yellow color.

We often use undesirable detergents to wash our shoes, contributing much to the yellow coloring.

Overuse

If we wear our shoes repeatedly, they may develop dirt and sweat stains. The sweat contributes to the foul smell shoes create. When these stains fail to wash completely, the shoes develop the yellow stains you see.

Sole

In most cases, we wash our shoes with the sole intact. After rinsing off the shoes, the dirt hidden in the sole comes out to stain the shoe. Try washing the shoe and the sole separately next time to see the difference.

How to remove yellow bleach stains from white canvas shoes

The following methods show significant results in removing yellow stains from shoes.

1.      Using Vinegar and Detergent

For perfect results, follow the following steps:

  • Mix in a clean sink or basin hot and cold water to achieve a lukewarm solution
  • Add ½ tablespoon of laundry detergent into the water
  • Stir the mixture with your hand or spoon to ensure a complete mixture
  • Soak your shoes in the mixture and use a clean toothbrush to wash away the stain
  • Wash with your washing machine gently and later a bit vigorous. If you don’t have a washing machine, use your hand gently and with more energy
  • With clear water into the machine, add a ½ cup of white vinegar and run the wash. If you do it with your hands, fill in another sink of water or basin, add the vinegar and scrub with your brush
  • Dry the shoes completely, and the yellow stains will be no more

2.      Hot water and salt scrub

  • Mix a tablespoon of salt with near-boiling water
  • Use a toothbrush and scrub the yellow stains in your shoes
  • Leave the shoe to dry and scrub again
  • When the stain has disappeared, let it dry, and the stain will be no more

3.      Cream of tartar

  • Put four cups of very hot water into a container
  • Put a half cup of tartar cream into the water and mix it
  • Soak the yellow-stained shoes into the mixture and leave them there for up to 90 minutes
  • After the stain has cleared, rinse the shoes with cold water and dry them completely

4.   Using only water and toilet paper

I find this method very helpful since you can find all the ingredients from home, and it’s effortless. You only need to:

  • Dip strait tissue pieces into clean water
  • Use the wet tissue pieces to wrap through your yellow-stained white sneakers.
  • Make a few wraps around your shoes.
  • Cover the wet tissue with a two-time layer of dry tissue paper
  • Leave the shoes to dry for 12-24 hours

To your surprise, your shoes will be stain-free after the drying period. 

Frequently Asked Questions

Does toothpaste clean yellow stains from shoes?

Yes, the white non-gel toothpaste, when scrubbed into the yellow stains, may make them fade away. Upon rinsing and drying, the stain clears. Never use the colored toothpaste, though. You may end up staining your shoes more.

Does bleach ruin white shoes?

If not rinsed off thoroughly, bleach causes yellow stains on shoes that may be hard to remove.

Does baking soda remove yellow stains on shoes?

Yes, though it must get mixed with white toothpaste and hydrogen peroxide. The mixture gets applied to the stained area and allowed to sit for 30 minutes. Upon rinsing, the stain clears.

Take away

Although yellow bleach stains may be a setback on our white sneakers, trying the above stain removal methods may save the day. Feel free to try the methods out and share your experience removing yellow stains on shoes in the comment section.

Images Source: Pexels.com
Filed Under: Blog, Shoes

Volleyball shoes vs Basketball shoes – What’s the difference

July 17, 2021 By Ema Watson

As I was looking for basketball shoes for my fifteen-year-old son, I came across very nice shoes. I bought them for him, but upon reaching home, he refused them, saying they were volleyball shoes.

It was a dramatic experience that left me displeased. So, before you get such an experience, keep reading and learn a few things you never knew differentiated these sports shoes.

What makes volleyball shoes different from basketball shoes

The soles

With basketball shoes, the soles will be made of rubber, therefore lightweight. This weight facilitates faster movement and turning. So because the shoes I bought for my son had a thinner sole, and although the sole was rubber, he felt that they would be uncomfortable.

The volleyball shoes, on the other hand, have a thicker sole with a gum rubber sole. This gum rubber helps in preventing them from sliding because most volleyball courts are very slippery.

When moving laterally, the volleyball shoes provide a firm grip too. The sole makes volleyball shoes unique for playing volleyball.

Cushioning

The basketball shoes have a thicker cushioning compared to the volleyball shoes. The cushioning of basketball shoes looks like that in running shoes. On the contrary, volleyball shoes need to be light to facilitate swift movement to and fro the playing ground. They have a thin cushioning layer.

If basketball shoes get used for volleyball, it would only take a short period before the cushioning deteriorated. Thus, the volleyball shoes get a thinner cushioning for comfort and landing, therefore, more emphasis is on the shoes’ sole.

Weight

When it comes to these two games, the interests of making both shoes seem to intertwine. Although both shoes should be light in weight, volleyball shoes need to be the lightest.

Light shoes will help the player when making swift movements on the court. The thick cushioning in the basketball shoes make them slightly heavier than volleyball ones.

Volleyball shoes have a mesh or nylon upper material to ensure air movement into the shoe. This mesh allows air movement into the shoe.

Midsoles

Basketball shoes have a generous share of the midsole section. This midsole is mainly made soft, and comfortable cushioning allows for comfort in the basketball court. Since basketball requires a lot of running and dripping, the basketball player requires comfort and stability. So, this midsole guarantees the player all that.

On the contrary, volleyball shoes don’t have a thick midsole section. Much emphasis with volleyball shoes is on the gum-like sole, which makes an impact on the ground. The comfortable landing surface makes volleyball shoes the best for the game. You will get volleyball shoes having a thin midsole.

Frequently Asked Questions (FAQs)

1.      Can basketball shoes be used as volleyball shoes?

Although people interchange these shoes, every shoe should be used for its purpose. The comfort when playing volleyball will not be the same as comfort from basketball shoes. So these shoes should not be interchanged.

2.      Can you wear a pad while playing volleyball?

Yes, you can wear a pad while playing volleyball. Since the knee pads protect against injury, wearing them in addition to proper volleyball shoes, you will play safe.

3.      Why are volleyball shorts so short?

Volleyball shorts get made short to facilitate comfortable leg movement when playing. You won’t want shorts that hold your steps or creep into uncomfortable places and prevent you from playing.

4.      What do female athletes wear under their shorts?

Most female athletes wear leggings or sliders. Sliders allow for easy sliding while gaming and work as compression shorts.

5.      Why do volleyball players wear leggings?

Volleyball players wear leggings and compression shorts because it helps in holding muscles firmly while playing. Athletes use them to facilitate blood flow into their muscles, and this improves their gaming performance.

Photo by Jim De Ramos from Pexels

Filed Under: Shoes

Will shin splints go away if I keep running?

May 31, 2021 By Ema Watson

Whether you are an avid runner or a professional athlete, you can agree when I say shin splints are the worst. Will shin splints go away if I keep running? That’s a common question among most athletes. The answer is No. while you still can, it’s not advisable.

Related Read: Best Running Shoes For Shin Splints: Reviews & Guide

Why avoid running with shin splints

The runners who attempt to run are at risk of prolonging the injury since they deny the injured tissue time to heal. By so doing, the injury may develop from a simple shin splint to a serious tibia stress fracture. 

If you must continue running, you should wrap the leg with tape or a bandage from above the ankle to the knee. However, running with shin splints is bad since the exercise will only boost pain and damage to the affected part. You need to either stop running or decrease the running or training intensity.

What happens if you develop shin splints?

The shin bone proceeds from a normal load to an overload and is later very overloaded. Eventually, if one keeps on running, it progresses to fracture. When the shin bone is overloaded, you feel more pain on the bones since the outer side develops small fracture lines. Once the bone is overloaded beyond its tolerance, fractures occur.

What about the symptoms?

  • Some swelling on the lower leg
  • Tenderness and pain along the tibia
  • If it progresses, you may notice lumps or bumps along with the bones
  • If it’s more severe, you may notice red patches on your skin around the skin area you experience the pains.  

At first, once you stop running, the pain may go away, but the pain becomes constant in serious cases. With that in mind, you should have a doctor check your conditions since most conditions may have similar symptoms.

Causes of shin splints

  • Running on hilly areas
  • An increase in training or running intensity or running longer distances
  • Increasing training days
  • Engaging in exercises that include frequent starts and halts like basketball or dancing

You can suffer shin splints if?

  • Train on harder surfaces 
  • Your feet are flat or rigid foot arches
  • Fail to wear proper running shoes

How to treat shin splints 

Provided you give your body enough rest, the damaged tissue will gradually heal.

Put ice on the shin to reduce the swelling and the pain. Continue icing the leg for three days or until the pain goes away.

Make good use of insoles on your shoes.

If need be, you can take some painkillers to ease the pain.

Tips to help you keep running pain-free

  • Treatment- as soon as you notice the pain, take rest for like 20 minutes and wait until the pain goes away.
  • Alternative exercise- You can keep active, but with low-impact forms of exercise as you give the shins time to heal.
  • Once the pain goes away, getting back to running goes back to running but with the right intensity to remain pain-free. Start running but with manageable exercises.
  • Recognize shin splints symptoms early- take note of the pains to rest and go back only when the pain subsides.

Shin splints are painful, but you can still go back to what you love the soonest with the right management. All the best as you run injury-free!

Image Source: Pexels.com

Filed Under: Blog

How to fix flat feet at home

May 18, 2021 By Ema Watson

A flat foot is characterized by the lack of an arc on the inner side of the foot. In most cases, the case is linked to genetics, obesity, footwear use, and other factors. However, even if born with flat feet, it’s crucial to take care of the foot to avoid pain, stress, and imbalances affecting other parts of the body.

When you treat flat feet, you can align the entire body and live a better life. Here are some tips on how to fix flat feet at home.  

Weight loss

For obese and overweight individuals, shedding off some pounds incorporates several benefits to the body. You can take some pressure off the bones, tendons, and ligaments on your feet. You also boost blood flow to the affected area.

Losing weight does not necessarily mean permanently fixing flat feet; however, it will positively affect other effects of flat feet to some extent. Get into a weight loss plan at home, and you will notice the difference.

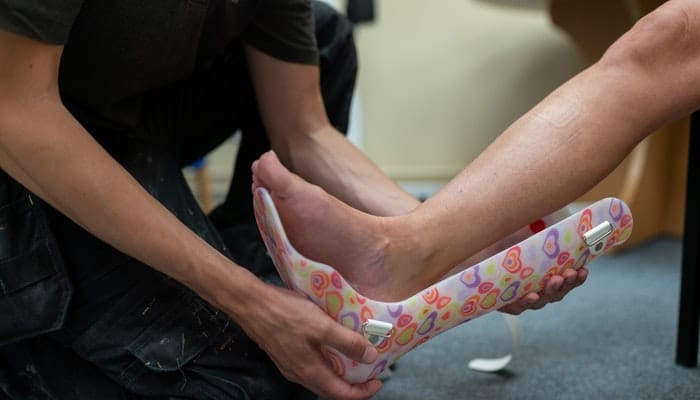
Custom orthotics

Such items are crucial and can fix flat feet. Those with flexible flat feet are usually seen as normal and may not need any treatment. However, if you experience pain when you stand or walk for long, you may consider orthotic shoes.

The orthotic shoes are semi-rigid shoe inserts whose purpose is to support the arc for better biomechanics as you walk, run or stand.

Shoes

Footwear also goes a long way into fixing flat feet. If you wear supportive shoes incorporating better support offers some relief to the foot, leg, and back symptoms. Try getting comfortable shoes, like walking or athletic shoes incorporating substantial arc support.

Also, make sure the shoe incorporates a firm heel counter as well as a flexible insole. Once you support the arches, you are reducing the tension hence less pain and discomfort.

Make sure your heels remain neutral

Most people suffering from the condition usually stand with heels at an angled-out position. What we mean by a neutral position is making sure the heel remains straight up and down position as you stand. Train yourself to maintain the neutral position to strengthen the muscles of the heel.

Foot tripod

This refers to the way a foot bottom contacts the ground. The three tripod parts are the toe base, the heel center, and the big toe base. Provided you attain the balance between the three points, you will get the ideal stability. You can get a professional to learn how you can easily feel how the points touch the ground as that’s the key to comfortable standing or even running. 

Exercises

You can do several flat feet exercises at home to make sure your feet remain comfortable and pain-free. Try finding a routine to exercise for better results. If the foot muscles aren’t strong enough to hold the body mass, you may feel the pain. That’s why you need to engage in exercises that aim at strengthening the muscles and lightening the arches.

By addressing the mobility issue emanating from flat feet, you can strengthen the arch muscles and reduce stress on the foot tissue. Once the tissue is stressed, you will feel pain as a result of over-pronation. Hopefully, the above guide on how to fix flat feet at home will help you understand your feet better. Besides, having flat feet isn’t the end of the world. You can still lead a fit and comfortable life.

Image Source: Unsplash.com

Filed Under: Blog

Wedge sole vs heel work boots – Which One Should I Choose?

May 17, 2021 By Ema Watson

Work footwear plays a crucial role in a worker’s overall productivity. A wrong pair of boots affect one’s performance, especially if the footwear makes the worker uncomfortable. The ideal way to choose a work boot is deciding on the outsole that keeps you comfortable throughout the day.

Wedge sole and heelwork boots are the popular footwear types associated with work boots, and the debate usually goes around the two. The article gives more information on wedge sole vs. heel work boots to help you choose the ideal one.

Comfort

When it comes to working boots, comfort should remain a priority since it determines your work output. Wedge work boots are better than the heeled ones since the sole runs through the entire boot. With that in mind, it distributes pressure to your entire foot.

On the other hand, heel boot incorporates two pressure points that can sometimes cause foot pains if you wear them for long hours.

Interaction with the surface

A wedge work boot incorporates a single piece of rubber running down from the heel up to the toe, forming a wedge shape. Unlike the heeled ones, the wedge shape allows the boot’s entire sole to touch the surface.

A heeled work boot does not sit fully on the ground with the front part tapping into the foot. That leaves the heel stack creating a lift at the back of your foot.

Construction

Wedge work boots usually incorporate rubber construction that runs from toe to the heel. The sole is usually made of polyurethane, a material famous for hardening soles to make them heat and slip resilience.

On the other hand, heel sole work boots are usually casual and can comprise various materials like rubber, wood, or even leather.

However, various work boots come with various materials and unique features depending on the manufacturer’s preference.

Traction

Heeled work boots offer better traction due to the existence of the lugs and treads. The features make them ideal for slippery surfaces. On the other hand, wedge boots have neither treads nor lugs meaning they offer fewer grips.

However, that does not mean that wedge boots lack traction, they are great performers, only that heeled ones outdo them on that particular aspect. Depending on the material, it’s possible to find a wedge boot with better traction than a heeled work boot.

Weight and Arch support

With wedge boots, their sole runs also run through the arc, which means you will get better arc support. With the heel soles, the arc support is less. When it comes to weight, wedge boots are lighter than the heel ones that come with extra weight.

Choosing the right boot is not always easy, especially if you have to decide between a heel and a wedge. However, remember that choosing the right one reduces your chances of discomfort or foot injury while working.

While both boots are stylish enough depending on one’s taste, consider your options wisely to get the ideal one. Whether you go for wedge or heel sole work boot, choose any depending on your unique needs.

Image Source: Amazon.com

Filed Under: Blog, Boots

How To Make Shoes Non Slip With Hot Glue

May 9, 2021 By Ema Watson

Walking on slippery shoes is not only an inconvenience but a recipe for danger. Over one million individuals are reported to experience trips, falls, and injuries every year in the US. Some fell and became permanently disabled or living with severe conditions affecting their way of life.

However, that does not mean you must throw away your favorite pair of shoes when they become slippery. With several tricks like using hot glue, you can quickly restore the shoe’s grip and enjoy your superb pair. Here are tricks on how to make shoes non-slip with hot glue. 

Identifying the Right Shoes

For the trick to work, you need to carefully check your footwear to make sure there are no holes. If the sole has holes, the procedure may fail to work. For the glue to stick well and offer the ideal grip, the sole needs to be smooth.

What to apply with

The procedure is like puff paints, but instead, you can decide to add the texture with a glue gun. Hot glue is clear and dries faster, making it better than colorful puff paints. It is also durable and bonds thoroughly on the soles. With hot glue, you will need to re-apply less frequently compared to other alternatives.

Prepare the gun

To boost the shoe’s grip with hot glue, you need first to prepare the gun. To prepare it, you need to insert a glue stick giving it room to heat. You will need to use the stick to make patterns, dots, or lines on the entire shoe for texture.

Hot gluing 

When using hot glue, start by gluing even spaced lines or dots along with the shoe heels and the sole. Make sure you apply the glue on the entire shoe for a better grip when walking. Depending on how hot the glue is, you need to wait until the glue gets dry; making sure it’s not tacky. 

Let the glue dry

Once you apply the glue, wait until it gets almost dry but not fully set. Before it fully dries, wear the shoe and walk slowly on a flat and hard surface. This is to make sure the glue dries at an even level to avoid affecting your gait when walking. Also, the process will help the glue bond well for more prolonged use. 

Get walking now

You can now walk freely, without worrying about slipping. Your shoes can now grip well even when walking on slippery surfaces. However, remember that applying hot glue is a temporary solution that lasts. If looking for a permanent solution, you can consider having your shoe resoled.  

Non-slip shoes help in avoiding injuries and accidents at the workplace or even at home. By transforming the slippery soles into rough surfaces, you get more grips in all situations. You will barely fall or slip even if you walk on a smooth floor. While there are numerous ways to make shoes non-slip, we found hot gluing the best. With the above hot-gluing steps to make your shoes non-slip, you will surely enjoy safe and comfortable walking from now on.

Image Source: Pixabay.com
Unsplash.com

Filed Under: Blog, Shoes

« Previous Page
Next Page »

Primary Sidebar

Recent Posts

  • How to Break in Climbing Shoes
  • How Do Burberry Shoes Run in Size?
  • Are HOKA Shoes Made in China?
  • How to Clean Nfinity Cheer Shoes
  • What Shoes to Wear With Leather Leggings

Categories

  • Blog
  • Boots
  • Buying Guides
  • Product Reviews
  • Shoes
  • About Us
  • Contact Us
  • Privacy Policy
  • Disclaimer